Shower Styling Guide for Northeast Florida Homes

Shower Styling Guide: Design Ideas for Humid, Salt-Air Florida Homes

Rainfall heads, niches, glass doors, trim, tubs and valves, plus exactly what to tell your tile contractor. Written for homes in Jacksonville, Fernandina Beach, Kingsland, Callahan and Yulee.

  • Free written estimates
  • Licensed & insured
  • Waterproofed & flood tested
  • Local Nassau County crew

Start here

How do you style a shower for Northeast Florida?

Style a Northeast Florida shower around moisture first and looks second. Pick porcelain or sealed stone, epoxy or urethane grout and fixtures in marine-grade stainless, solid brass or PVD finishes. Then plan every niche, valve and glass hinge before the walls are closed.

From there, the style is yours: a rainfall head, a cleanly trimmed niche, frameless glass, a clawfoot tub. Whether you live in a new build in Wildlight or a 1900s Victorian near downtown Fernandina Beach, this guide breaks down six shower choices, shows you your options and gives you the words to use with your tile contractor so nothing gets missed.

Shower component 01

Rainfall Shower Heads

Decide before: plumbing rough-in and ceiling framing

A rainfall shower head sends water down in a wide, gentle sheet instead of a focused jet. It is the spa look most homeowners picture when they say "luxury shower." The trade-off is that the same flow spread over a larger face feels softer, so size, mounting style and companion fixtures matter more than the price tag.

Federal rules cap a single shower head at 2.5 gallons per minute, and WaterSense models use 2.0 or less. A bigger head does not use more water. It spreads the same water wider.

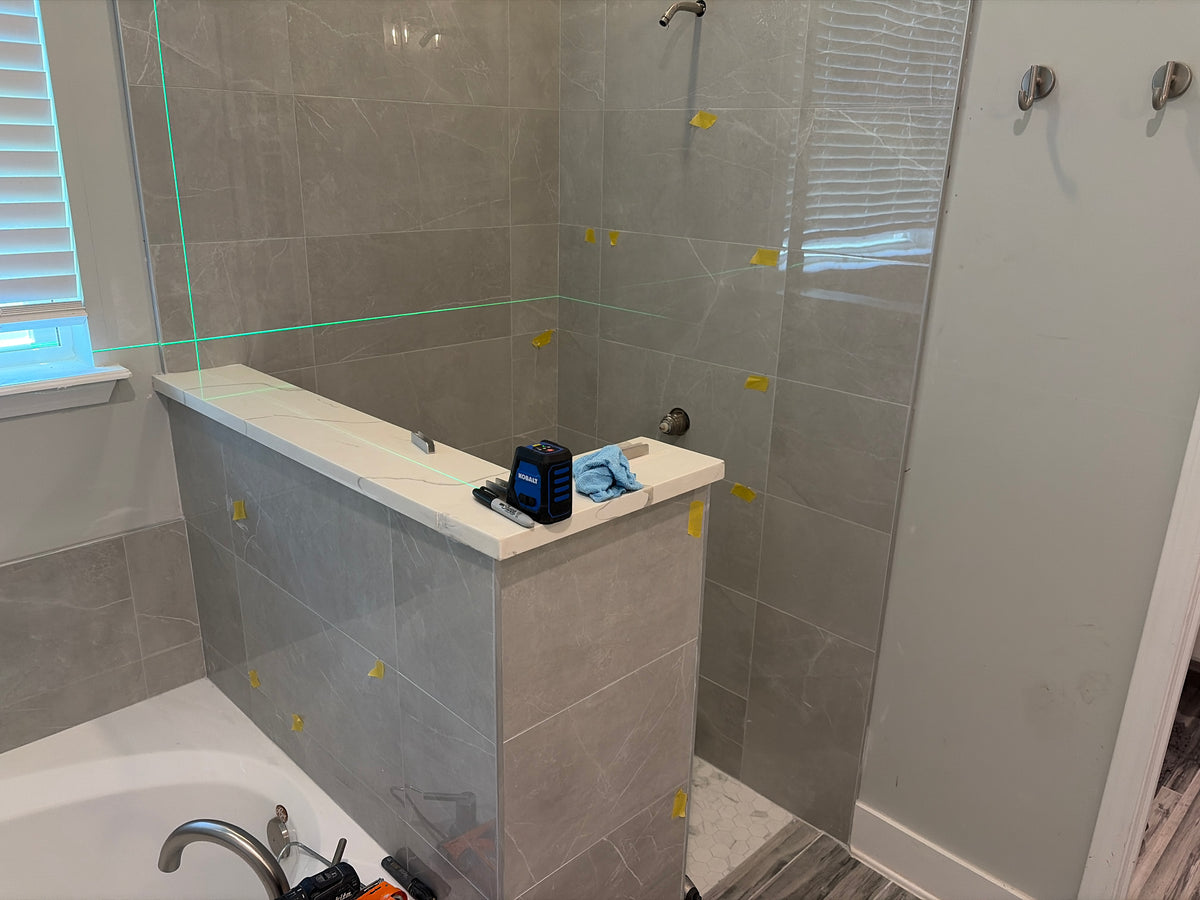
Rainfall Shower Heads in a custom tile shower by Sand & Stone Tile, Northeast Florida
Rainfall Shower Heads design idea for a Jacksonville and Nassau County bathroom

Your options

Ceiling-mounted rainfall head — rainfall shower heads idea from Sand & Stone Tile

Ceiling-mounted rainfall head

Best for: Tall ceilings, glass-enclosed showers and a true "standing in the rain" feel

Mounts flush or on a short drop pipe directly overhead so water falls straight down. It is the cleanest look, and it keeps the spray off the glass door. The supply line runs through the ceiling framing before the ceiling goes up.

Watch out for: Needs ceiling blocking and a tiled or fully waterproofed shower ceiling. It is hard to relocate later.

Wall-arm rainfall head (8"–12") — rainfall shower heads idea from Sand & Stone Tile

Wall-arm rainfall head (8"–12")

Best for: Remodels and tub-to-shower conversions where opening the ceiling is not practical

A wall-mounted arm holds a round or square head out and slightly down. It uses the existing wall plumbing, so it is the easier option in older homes, and you can stand outside the stream while the water warms up.

Watch out for: Set the arm high enough for the tallest person in the house, commonly 80 inches or more. Think about where the stream lands relative to the glass.

Rainfall + handheld combo — rainfall shower heads idea from Sand & Stone Tile

Rainfall + handheld combo

Best for: Families, kids, pets, rinsing the shower and anyone who wants flexibility

A rainfall head paired with a handheld on a slide bar (or with body sprays) through a diverter gives you both: the soft overhead soak and a strong, targeted spray when you need it. This is the setup we recommend most often.

Watch out for: Each added outlet needs its own valve port and enough supply. Ask your plumber whether a larger supply line or a second valve is needed.

Oversized (16"+) and rain-panel heads — rainfall shower heads idea from Sand & Stone Tile

Oversized (16"+) and rain-panel heads

Best for: Large walk-in showers and primary suites

Panel-style heads and 16-inch-plus rain plates cover the whole stall and make a dramatic statement. They suit larger enclosures where the generous spray stays contained.

Watch out for: The soft, low-pressure feel is even more noticeable, and open walk-in designs can overspray. Confirm the glass or wall layout will contain it.

Common mistakes to avoid

  • Putting a rainfall head directly over the glass door so the door takes the spray.
  • Buying a head for looks only and skipping a handheld, then missing it every time you clean the shower.
  • Forgetting ceiling blocking, then hanging a heavy head from thin drywall.

Shower component 02

Niche & Shelf Options

Decide before: wall framing and waterproofing

A niche is the recessed shelf built into a shower wall so shampoo and soap stay off the floor and out of sight. It is one of the most-used and most-loved parts of a tile shower, and one of the easiest to get wrong, because it has to be framed and waterproofed as part of the wall.

Choose the size, location and liner tile together with your tile layout, so the edges land on full tiles instead of thin slivers.

Niche & Shelf Options in a custom tile shower by Sand & Stone Tile, Northeast Florida
Niche & Shelf Options design idea for a Jacksonville and Nassau County bathroom

Your options

Single recessed niche — niche & shelf options idea from Sand & Stone Tile

Single recessed niche

Best for: Most showers, for one or two people

The standard niche is framed between two studs, usually about 12 inches wide, and sits near chest height. It is economical, tidy and works on most walls.

Watch out for: The stud bay has to be clear of pipes and wiring, and the wall must be deep enough to take it.

Double or stacked niche — niche & shelf options idea from Sand & Stone Tile

Double or stacked niche

Best for: Couples, families and anyone with a lot of bottles

Two shelves in one opening, or two niches side by side, double the storage and keep the walls clear of caddies. A stacked unit needs a taller opening and the framing to match.

Watch out for: A tall opening can weaken a wall if it is not framed properly. Plan it with your contractor, not afterwards.

Linear (horizontal) ledge niche — niche & shelf options idea from Sand & Stone Tile

Linear (horizontal) ledge niche

Best for: Modern walk-in showers and long feature walls

A long, shallow niche, often four feet or more wide and four to six inches tall, runs across the wall like a built-in ledge. Lined with accent or mosaic tile, it becomes a design feature in its own right.

Watch out for: It spans several studs, so it needs a header and careful planning around pipes and the valve.

Pre-formed vs. site-built niche — niche & shelf options idea from Sand & Stone Tile

Pre-formed vs. site-built niche

Best for: Anyone who wants a reliably waterproof build

Pre-formed foam or PVC niches arrive already waterproofed and sloped. Site-built niches can be any size or shape but depend on careful membrane work. Either can be excellent when installed correctly.

Watch out for: Pre-formed sizes are fixed, so choose the unit that fits your tile layout before ordering.

Corner or surface-mounted shelves — niche & shelf options idea from Sand & Stone Tile

Corner or surface-mounted shelves

Best for: Block exterior walls, tight remodels and rentals

Stone, tile, solid-surface or stainless corner shelves mount on top of the finished wall, so no framing changes are needed. They are the flexible choice when a recessed niche will not fit.

Watch out for: Shelves must be anchored into solid blocking, not just tile. Skip suction or adhesive shelves in a humid shower. They fail.

Common mistakes to avoid

  • Adding a niche after the wall is already waterproofed and tiled.
  • Placing the niche directly opposite the shower head where it takes the full spray.
  • Choosing a niche size that leaves thin slivers of tile at its edges.
  • Building a flat niche floor with no slope, so water sits and stains.

Shower component 03

Glass Enclosures & Doors

Plan early, order after tile: glass is measured once tile is finished

Glass is what turns a tiled alcove into a finished shower. It keeps the water in, lets light through and makes a small bathroom feel larger. It also has the longest lead time, and it is the only part of the shower that is measured after the tile is complete.

Building codes require tempered (safety) glass in showers. Thickness, hardware and style change how the door looks, feels and ages.

Glass Enclosures & Doors in a custom tile shower by Sand & Stone Tile, Northeast Florida
Glass Enclosures & Doors design idea for a Jacksonville and Nassau County bathroom

Your options

Frameless glass (3/8" or 1/2") — glass enclosures & doors idea from Sand & Stone Tile

Frameless glass (3/8" or 1/2")

Best for: A clean, high-end look that shows off your tile

Thick tempered glass held by hinges and clamps with no metal frame. It is the most popular style, easy to wipe down and the best way to showcase tile.

Watch out for: A frameless door can weigh well over 50 pounds, so hinges must anchor into solid blocking. Walls in older homes are rarely perfectly plumb.

Semi-frameless — glass enclosures & doors idea from Sand & Stone Tile

Semi-frameless

Best for: A budget-friendly upgrade from builder-grade frames

Thinner glass with a minimal metal header or frame on part of the enclosure. It looks close to frameless at a lower price.

Watch out for: More metal means more places for moisture and mildew to collect, and the frame finish matters in coastal air.

Fixed panel or doorless walk-in — glass enclosures & doors idea from Sand & Stone Tile

Fixed panel or doorless walk-in

Best for: Curbless entries, accessibility and large showers

One fixed panel, sometimes with a short return, blocks most of the spray. There is no door to open or clean. It is minimalist, easy to maintain and great for aging in place.

Watch out for: It needs enough shower depth, and the head must be placed so water does not escape onto the bathroom floor.

Sliding / bypass doors — glass enclosures & doors idea from Sand & Stone Tile

Sliding / bypass doors

Best for: Tub-to-shower conversions and tight bathrooms

Two panels glide on a track, so no door swing is needed. Frameless sliders look sleek over a tub or in a narrow shower.

Watch out for: Tracks collect soap scum and mildew. Ask for a design that is easy to clean.

Low-iron glass and protective coatings — glass enclosures & doors idea from Sand & Stone Tile

Low-iron glass and protective coatings

Best for: Keeping glass clear against hard and well water

Standard clear glass has a faint green tint. Low-iron (ultra-clear) glass looks crisp against white and light tile. A factory-applied protective coating helps water bead off and reduces mineral spotting.

Watch out for: Coatings still need a quick squeegee after showers. Hard-water spots left to bake on will win.

Common mistakes to avoid

  • Ordering the glass before the tile is set. It has to be made to the finished dimensions.
  • Choosing the thinnest, cheapest hardware in a coastal home.
  • Skipping the plan for the curb or glass channel, so the door cannot seal properly.

Shower component 04

Trim & Tile Options

Decide before: tile is ordered and the layout is set

Tile and trim are what you see every day. The tile sets the mood (crisp white subway, warm stone, glossy zellige or classic hex), while trim, grout and edge details make it look finished and decide how well it holds up to humidity.

In a wet area, the unglamorous choices (tile type, slip resistance, grout and edge treatment) matter as much as color.

Trim & Tile Options in a custom tile shower by Sand & Stone Tile, Northeast Florida
Trim & Tile Options design idea for a Jacksonville and Nassau County bathroom

Your options

Porcelain and ceramic tile — trim & tile options idea from Sand & Stone Tile

Porcelain and ceramic tile

Best for: Nearly every shower, especially in humid homes

Porcelain is dense, nearly waterproof and low-maintenance, which is why it is our go-to here. Large-format porcelain means fewer grout lines to clean, and modern porcelain can mimic marble, wood or old-fashioned encaustic cement tile.

Watch out for: Large tiles need a flat, well-prepped wall. Ask what size is right for your shower floor.

Natural stone — trim & tile options idea from Sand & Stone Tile

Natural stone

Best for: Warm, one-of-a-kind character and historic-style baths

Marble, limestone, travertine and slate bring natural variation no printed tile can match. Honed finishes hide water spots better than polished.

Watch out for: Stone is porous and needs sealing on a schedule, and marble can etch from acidic cleaners. In a damp shower, plan for ongoing maintenance.

Mosaics, hex and accent tile — trim & tile options idea from Sand & Stone Tile

Mosaics, hex and accent tile

Best for: Shower floors, niche liners and period accents

Small tile such as hex, penny round, basketweave, glass or stone mosaic flexes to the slope of a shower floor, adds traction and makes a great accent band or niche back.

Watch out for: More tile means more grout lines. Pair mosaics with epoxy or urethane grout so they clean up easily.

Metal trim and edge profiles — trim & tile options idea from Sand & Stone Tile

Metal trim and edge profiles

Best for: Clean, modern edges where tile ends

Metal profiles finish outside corners and tile edges without bullnose pieces, in satin anodized aluminum, brushed stainless, brass or matte black. They also protect edges from chipping.

Watch out for: Match the finish to your hardware or choose a neutral that disappears. Cheap plated profiles can corrode near the coast, so ask for stainless, solid brass or quality anodized finishes.

Bullnose, pencil liner and classic trim — trim & tile options idea from Sand & Stone Tile

Bullnose, pencil liner and classic trim

Best for: Traditional and historic-style bathrooms

Ceramic bullnose, pencil liners, chair rails and cove base finish tile the traditional way. They are the right detail for Victorian, Craftsman and Mediterranean Revival baths.

Watch out for: Order trim pieces with the field tile, from the same dye lot. Matching them later can be hard.

Grout choices — trim & tile options idea from Sand & Stone Tile

Grout choices

Best for: Staying clean in a humid climate

Cementitious grout is economical but porous and needs sealing. Epoxy and urethane grouts resist stains, mildew and discoloration, which suits a damp climate.

Watch out for: Mid-tone grouts hide soap scum and mildew better than bright white. Use flexible caulk, not grout, in corners and at changes of plane.

Common mistakes to avoid

  • Choosing tile from a showroom photo instead of a sample in your own bathroom light.
  • Ordering exactly the square footage you need. Order 10–15% extra for cuts and future repairs.
  • Using grout instead of flexible caulk in corners and at the tub or curb.
  • Skipping the exhaust fan upgrade in a bathroom that never fully dries.

Shower component 05

Tub Options

Decide before: demo and floor / plumbing rough-in

Whether you are keeping a tub, adding a soaker or swapping the tub for a walk-in shower, the choice affects your floor, plumbing and tile design. It is a bigger structural decision than any other fixture, so make it early.

Many homeowners in Jacksonville and Nassau County are weighing tub-to-shower conversions, which we do regularly.

Tub Options in a custom tile shower by Sand & Stone Tile, Northeast Florida
Tub Options design idea for a Jacksonville and Nassau County bathroom

Your options

Alcove tub with a tiled surround — tub options idea from Sand & Stone Tile

Alcove tub with a tiled surround

Best for: Family bathrooms and tub / shower combos

The classic three-wall tub finished with a tile surround. It is efficient and kid-friendly, and tile makes it feel custom.

Watch out for: Finish the tile-to-tub joint with flexible caulk, not grout, and leave access to the plumbing.

Drop-in or undermount tub with a tile deck — tub options idea from Sand & Stone Tile

Drop-in or undermount tub with a tile deck

Best for: A built-in spa look

The tub sits inside a tiled platform, giving you a deck for candles, towels and fixtures. It is the most customizable approach.

Watch out for: The deck is a wet surface that needs waterproofing and slope, and the plumbing needs an access panel.

Freestanding tub — tub options idea from Sand & Stone Tile

Freestanding tub

Best for: Primary baths with room to spare

A standalone sculptural tub in acrylic, stone resin or cast iron becomes the focal point of the room. Floor- or wall-mounted fillers complete the look.

Watch out for: A filled, occupied tub is very heavy, so the floor framing must carry it and the drain and filler rough-ins need exact locations.

Clawfoot / cast-iron tub — tub options idea from Sand & Stone Tile

Clawfoot / cast-iron tub

Best for: Historic and Victorian homes

The tub that defined early-1900s baths. A period clawfoot with an exposed-pipe filler is a natural match for an older Fernandina Beach or Riverside home.

Watch out for: Cast iron can weigh several hundred pounds empty. Older pier-and-beam floors may need reinforcing.

Tub-to-walk-in-shower conversion — tub options idea from Sand & Stone Tile

Tub-to-walk-in-shower conversion

Best for: Aging in place, easy cleaning and tight bathrooms

Remove the tub, rebuild and waterproof the wet area and install a low-threshold or curbless tile shower, with blocking for grab bars. It is one of our most requested projects.

Watch out for: Think about resale. Many buyers want at least one tub somewhere in the house.

Common mistakes to avoid

  • Buying a tub before checking that it fits through the doorway and up the stairs.
  • Skipping the access panel behind a tub deck.
  • Using grout instead of caulk at the tub-to-tile joint.

Shower component 06

Valve & Hardware Options

Decide before: the walls are closed

The valve is the hidden heart of your shower and the hardware is the jewelry. The valve controls temperature and flow and gets buried in the wall, so it has to be chosen before the wall is closed. The trim (handles, shower arm, escutcheons and drain) is what you see, and it is where you express your style.

Choosing fixtures from one collection in one finish makes the whole bathroom look intentional.

Valve & Hardware Options in a custom tile shower by Sand & Stone Tile, Northeast Florida
Valve & Hardware Options design idea for a Jacksonville and Nassau County bathroom

Your options

Pressure-balance valve — valve & hardware options idea from Sand & Stone Tile

Pressure-balance valve

Best for: Most standard showers with one or two outlets

A single handle holds the temperature steady when someone flushes a toilet or runs a faucet. It is the dependable, economical choice.

Watch out for: Best with a small number of outlets. For several heads, consider a thermostatic valve.

Thermostatic valve — valve & hardware options idea from Sand & Stone Tile

Thermostatic valve

Best for: Rainfall + handheld + body sprays and precise temperature

Separate controls for temperature and flow let you set an exact temperature and run several outlets at once. It feels like a luxury shower.

Watch out for: It costs more, takes more wall space and needs the right rough-in decided ahead of time.

Diverters and multi-outlet setups — valve & hardware options idea from Sand & Stone Tile

Diverters and multi-outlet setups

Best for: Combination rainfall, handheld and tub filler

A diverter sends water to different outlets (two-way, three-way or more). Integrated diverters live in the valve, while separate ones add extra handles.

Watch out for: Every outlet has to be chosen and mapped before plumbing begins.

Finishes: chrome, nickel, black and brass — valve & hardware options idea from Sand & Stone Tile

Finishes: chrome, nickel, black and brass

Best for: Matching your style and your environment

Polished chrome is bright and classic, brushed nickel hides water spots, matte black is bold, and champagne or brushed brass is warm. Pick one finish for the valve trim, head, drain, grab bars and glass hardware.

Watch out for: Finish quality varies widely. Look for PVD finishes with a lifetime finish warranty.

Drains, handhelds and grab bars — valve & hardware options idea from Sand & Stone Tile

Drains, handhelds and grab bars

Best for: Comfort, safety and easy cleaning

Linear drains look sleek and let you use large-format floor tile. A handheld on a slide bar helps with rinsing, and grab bars (or at least blocking behind the tile) prepare the shower for the future.

Watch out for: Blocking must go in before the tile. Adding grab bars later means hunting for studs through finished tile.

Common mistakes to avoid

  • Buying the trim and the rough-in valve from different product lines. They have to match.
  • Mixing too many metal finishes.
  • Buying fixtures with no warranty, no replacement parts or no return policy.

Built for where you live

Designing a Shower for Northeast Florida's Humidity, Salt Air and Historic Homes

A shower in Fernandina Beach, Jacksonville, Kingsland, Callahan or Yulee works harder than the same shower in a dry climate. Here is what is different about building one here, and how each condition changes the choices above.

Year-round humidity and your shower — Northeast Florida tile guide

Year-round humidity

Summer dew points in Northeast Florida routinely sit in the 70s, and relative humidity often stays above 70 percent. Bathrooms rarely dry out completely, which is the perfect environment for mildew in grout, caulk and paint.

What it means for your shower: Use porcelain, epoxy or urethane grout, a properly vented exhaust fan and tile that runs well above head height or to the ceiling.

Salty beach air and your shower — Northeast Florida tile guide

Salty beach air

Onshore breezes carry salt well beyond the beachfront on Amelia Island, the Talbot Islands and the tidal rivers. Salt speeds up pitting and corrosion on metal fixtures, glass hardware and trim.

What it means for your shower: Choose solid brass, 316 stainless steel and PVD-finished valves, glass hardware and tile trim instead of thin plated parts.

Mineral-heavy and well water and your shower — Northeast Florida tile guide

Mineral-heavy and well water

Water drawn from the Floridan aquifer can be mineral-rich, and homes on private wells (common around Callahan, Hilliard and rural Nassau County) often deal with iron and sulfur. Minerals spot glass, stain grout and clog rainfall nozzles.

What it means for your shower: Choose rub-clean silicone nozzles, coated glass and serviceable valve cartridges, and consider a filter or softener.

Rentals and second homes and your shower — Northeast Florida tile guide

Rentals and second homes

Amelia Island and Fernandina Beach have many vacation rentals and part-time homes, where a shower might sit unused for weeks and then see heavy back-to-back use.

What it means for your shower: Prioritize durable, easy-to-clean choices: porcelain, epoxy grout, a handheld, slip-rated floor tile and hardware with readily available replacement parts.

New construction and builder-grade upgrades and your shower — Northeast Florida tile guide

New construction and builder-grade upgrades

Newer neighborhoods in Wildlight, Nassau Crossing, Kingsland and growing parts of Jacksonville are built on slabs, often with fiberglass tubs and basic builder tile. Upgrading is straightforward because framing is consistent and plumbing is easy to reach.

What it means for your shower: Popular upgrades: replace the fiberglass unit with a custom tile shower, add a niche and bench, and swap builder-grade hardware for a better set.

Talking to your contractor

How to Talk to Your Contractor: Decide the Right Things at the Right Time

The most common reason a shower disappoints is not the tile. It is a decision that was made too late. Use this timeline to settle the right things at the right time, and bring this page to your free estimate.

  1. Before demo

    Set the plan and pick the big pieces

    Walk the bathroom with your contractor and settle the choices that change the walls and floor: rainfall head position, valve type, niche size and location, glass style, tub plan and tile size.

    • Photos or screenshots of showers you love (and ones you do not)
    • Who uses the shower, the tallest user, how many bottles, and any mobility needs
    • Rainfall head: ceiling or wall arm, plus any handheld or body sprays
    • Niche count, size and location, and whether you want a bench
    • Glass style or doorless, and whether the tub stays, goes or changes
    • A budget range, so options are priced to fit
  2. Before framing and rough-in plumbing

    Lock in the valve, fixtures and blocking

    Once the wall is open, your contractor sets framing, valve depth and plumbing for every outlet. Changes now are cheap. Changes after waterproofing are not.

    • The exact valve and trim kit (brand, model and finish)
    • The number of outlets and how they are controlled
    • Blocking for grab bars, a shower seat, glass door hinges and heavy shelves
    • Niche framing size and position
    • Ceiling framing for a ceiling-mounted head
    • Exhaust fan size, location and exterior venting
  3. Before waterproofing and tile

    Approve the tile, layout and trim

    Before tile is ordered and set, approve the layout, pattern, trim pieces, grout type and color. The waterproofing is flood tested before a single tile goes up.

    • Final tile, size, pattern and grout joint width
    • Trim: metal profile, bullnose or mitered edge, and the finish color
    • Floor tile with a wet-area slip rating, and your drain style
    • Niche liner tile and shelf material
    • 10–15% extra tile and trim pieces from the same dye lot
    • How the shower will be waterproofed and flood tested
  4. After tile and grout

    Measure glass and finish the fixtures

    Once tile and grout are done, the glass company measures for custom glass, and the final fixtures go on.

    • Schedule the glass measure right after grouting
    • Confirm the glass hardware finish matches the valve trim
    • Let the grout cure and seal it per the product instructions before heavy use
    • Final walk-through: test every outlet, check caulk lines and check drain flow
  5. After you move in

    Keep a humid-climate shower looking new

    A well-built shower is easy to keep up, if you build a few habits in a damp climate.

    • Run the exhaust fan during and for about 20 minutes after each shower
    • Squeegee glass and wipe mineral spots before they dry
    • Re-caulk movement joints as soon as they crack or discolor
    • Reseal natural stone and cement-based grout on schedule
    • Clean metal fixtures with mild soap and a soft cloth. Abrasive cleaners strip finishes

Shower Design Questions from Northeast Florida Homeowners

Straight answers about humidity, salt air, historic homes and planning your shower.

What are the best shower fixture finishes for salt air near Amelia Island and Fernandina Beach?

Solid brass and 316 marine-grade stainless steel, finished in PVD, hold up best near the coast. PVD (physical vapor deposition) finishes are bonded to the metal and resist tarnish and corrosion better than thin plated finishes. Brushed nickel and stainless hide water spots well, unlacquered brass patinas quickly near the ocean, and matte black varies by brand, so check the warranty.

We are glad to review model numbers before you buy.

How do I keep mold and mildew out of a shower in humid Florida?

Start with materials that do not absorb water (porcelain tile and epoxy or urethane grout), then ventilate. Run an exhaust fan that vents outdoors during and for about 20 minutes after each shower, and size it for the room. A common guideline is at least 1 CFM per square foot. Use mildew-resistant caulk in corners and at changes of plane, and squeegee glass and walls when you can.

A properly waterproofed shower also stays drier behind the tile, which is where hidden mildew problems start.

Will a rainfall shower head feel like weak water pressure?

It can, because the same flow is spread across a wider face. Federal rules limit a shower head to 2.5 gallons per minute, so a rainfall head is gentler by design. Many people love that. If you want something stronger, pair it with a handheld or body sprays through a diverter. Your home's water pressure and pipe size matter too, so ask your plumber to check before rough-in.

Can I add a shower niche after the shower is already tiled?

Usually not cleanly. A recessed niche has to be framed and waterproofed together with the rest of the wall, so it should be planned before tile goes up. If the shower is already finished, a surface-mounted corner shelf is the safer option, because cutting into a finished wall risks the waterproofing. Call us and we will tell you what is realistic.

Is a frameless glass shower door worth it in a humid, coastal climate?

Yes, if the hardware is right. Frameless glass has fewer crevices for mildew than framed enclosures and wipes down easily. Ask for 316 stainless or brass hardware, a protective glass coating and mildew-resistant seals, and squeegee after showers, especially if you have hard or well water.

Can a historic home in Fernandina Beach or Jacksonville get a modern shower and still look period-correct?

Yes. Classic details such as white subway tile, hex or basketweave floors, pencil trim, a clawfoot tub and an exposed-pipe shower look right in a Victorian, Craftsman or Mediterranean Revival bath, while a modern waterproofing system, valve and ventilation work behind them. The key is inspecting the framing, plaster and floors first. If your home is in a historic district, check with the city about any exterior-facing changes, such as windows or fan vents, before you start.

What decisions should I make before my tile installer starts demo?

Five choices change the walls and plumbing, so settle them first: your rainfall head (ceiling or wall mount) and any handheld or body sprays, the valve and trim kit, niche size and location, the glass style (or doorless), and what you want to do about the tub. The timeline above breaks these into what to decide before demo, before rough-in and before tile.

How much does a custom tile shower cost in Jacksonville and Nassau County?

It depends on the shower's size, the tile, how many niches and outlets you want, whether the plumbing moves, the glass and how much prep the walls and floor need. A small porcelain shower is a very different job from a curbless marble walk-in with a linear drain and frameless glass. We give free written estimates after seeing the space. Call (772) 353-9986.

Do you install custom tile showers in Callahan, Kingsland, Jacksonville and Fernandina Beach?

Yes. Sand & Stone Tile is based in Yulee and installs custom tile showers, tub-to-shower conversions and bathroom remodels throughout Nassau County, Jacksonville and Duval County, and Camden County, Georgia, including Callahan, Fernandina Beach, Amelia Island and Kingsland. Call (772) 353-9986 for a free written estimate.

Still have a question about your shower? Call us directly at (772) 353-9986

Ready to Plan Your Shower?

Bring your ideas, or just a few photos you love, and we will walk through every choice in this guide in your own bathroom, with a clear written estimate. No pressure, no vague numbers.

Free estimates • Licensed & insured • Serving Jacksonville, Fernandina Beach, Kingsland, Callahan & Yulee